The Key Fit Signals feature uses recruitRyte’s AI to evaluate large volumes of candidates against complex, customized criteria. Instead of manually reviewing hundreds or thousands of resumes, you can ask the AI specific questions and automatically surface the strongest matches.
1. Setting Your Key Fit Signals
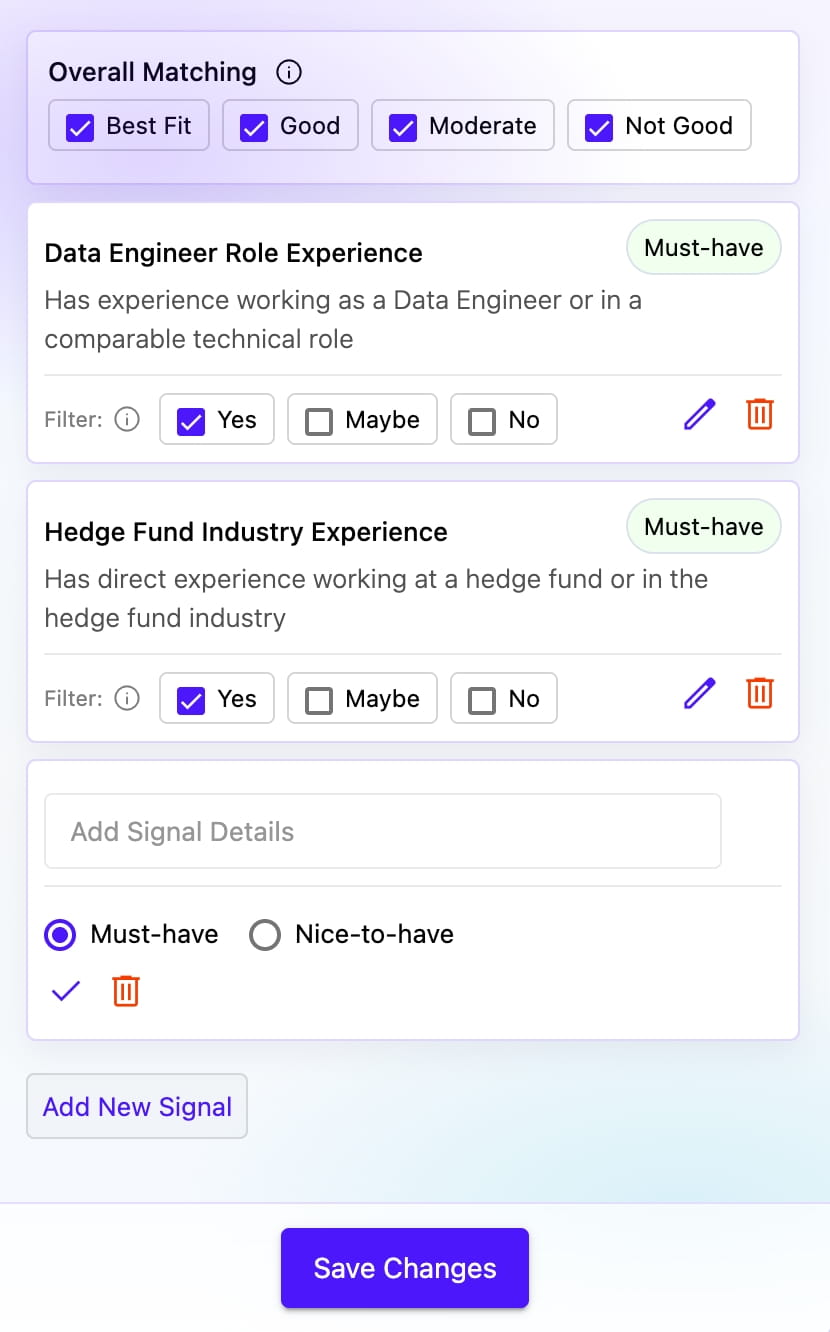
Use the Key Fit Signals panel to define the precise requirements you want the AI to evaluate against your candidate pool.
| Section | Description | Action |
|---|---|---|
| Overall Matching | Filter candidates by their overall match score: Best Fit, Good, Moderate, or Not Good. | Check or uncheck categories to show/hide candidates at each match level. |
| Signal Cards | Each signal displays a title, description, priority badge (Must-have), and filter options. | Use the filter checkboxes (Yes, Maybe, No) to control which candidates appear based on each signal. |
| Add Signal Details | Input field to create a new signal using natural language (e.g., “Has experience with Python”). | Enter your criteria, select Must-have or Nice-to-have, then click the checkmark to add. |
| Add New Signal | Button to add additional screening criteria not captured by the AI interpretation. | Click to expand the input field and define custom signals. |
| Save Changes | Saves your signal configuration and re-runs the AI screening process. | Click after adding, editing, or removing signals to update your results. |
Understanding Signal Filters
Each signal card includes filter options that let you control which candidates appear in your results:
| Filter Option | Description | When to Use |
|---|---|---|
| Yes | Candidate clearly matches this signal criteria | Check to include candidates who definitely have this qualification |
| Maybe | Candidate might match based on available information | Check to include candidates with potential matches worth reviewing |
| No | Candidate does not match this signal criteria | Check to include candidates who don’t have this qualification (useful for Nice-to-have signals) |
Tip: For Must-have signals, typically only check “Yes” to ensure all candidates meet essential requirements. For Nice-to-have signals, check all three to see the full pool while still using the signal for ranking.
Managing Your Signals
| Action | How To | When to Use |
|---|---|---|
| Edit Signal | Click the pencil icon next to the signal | Modify the signal description or criteria |
| Delete Signal | Click the trash icon next to the signal | Remove signals that aren’t relevant to your search |
| Change Priority | Edit the signal and select Must-have or Nice-to-have | Adjust how strictly the signal filters candidates |
| Adjust Filters | Check/uncheck Yes, Maybe, No for each signal | Fine-tune which candidates appear based on signal matches |
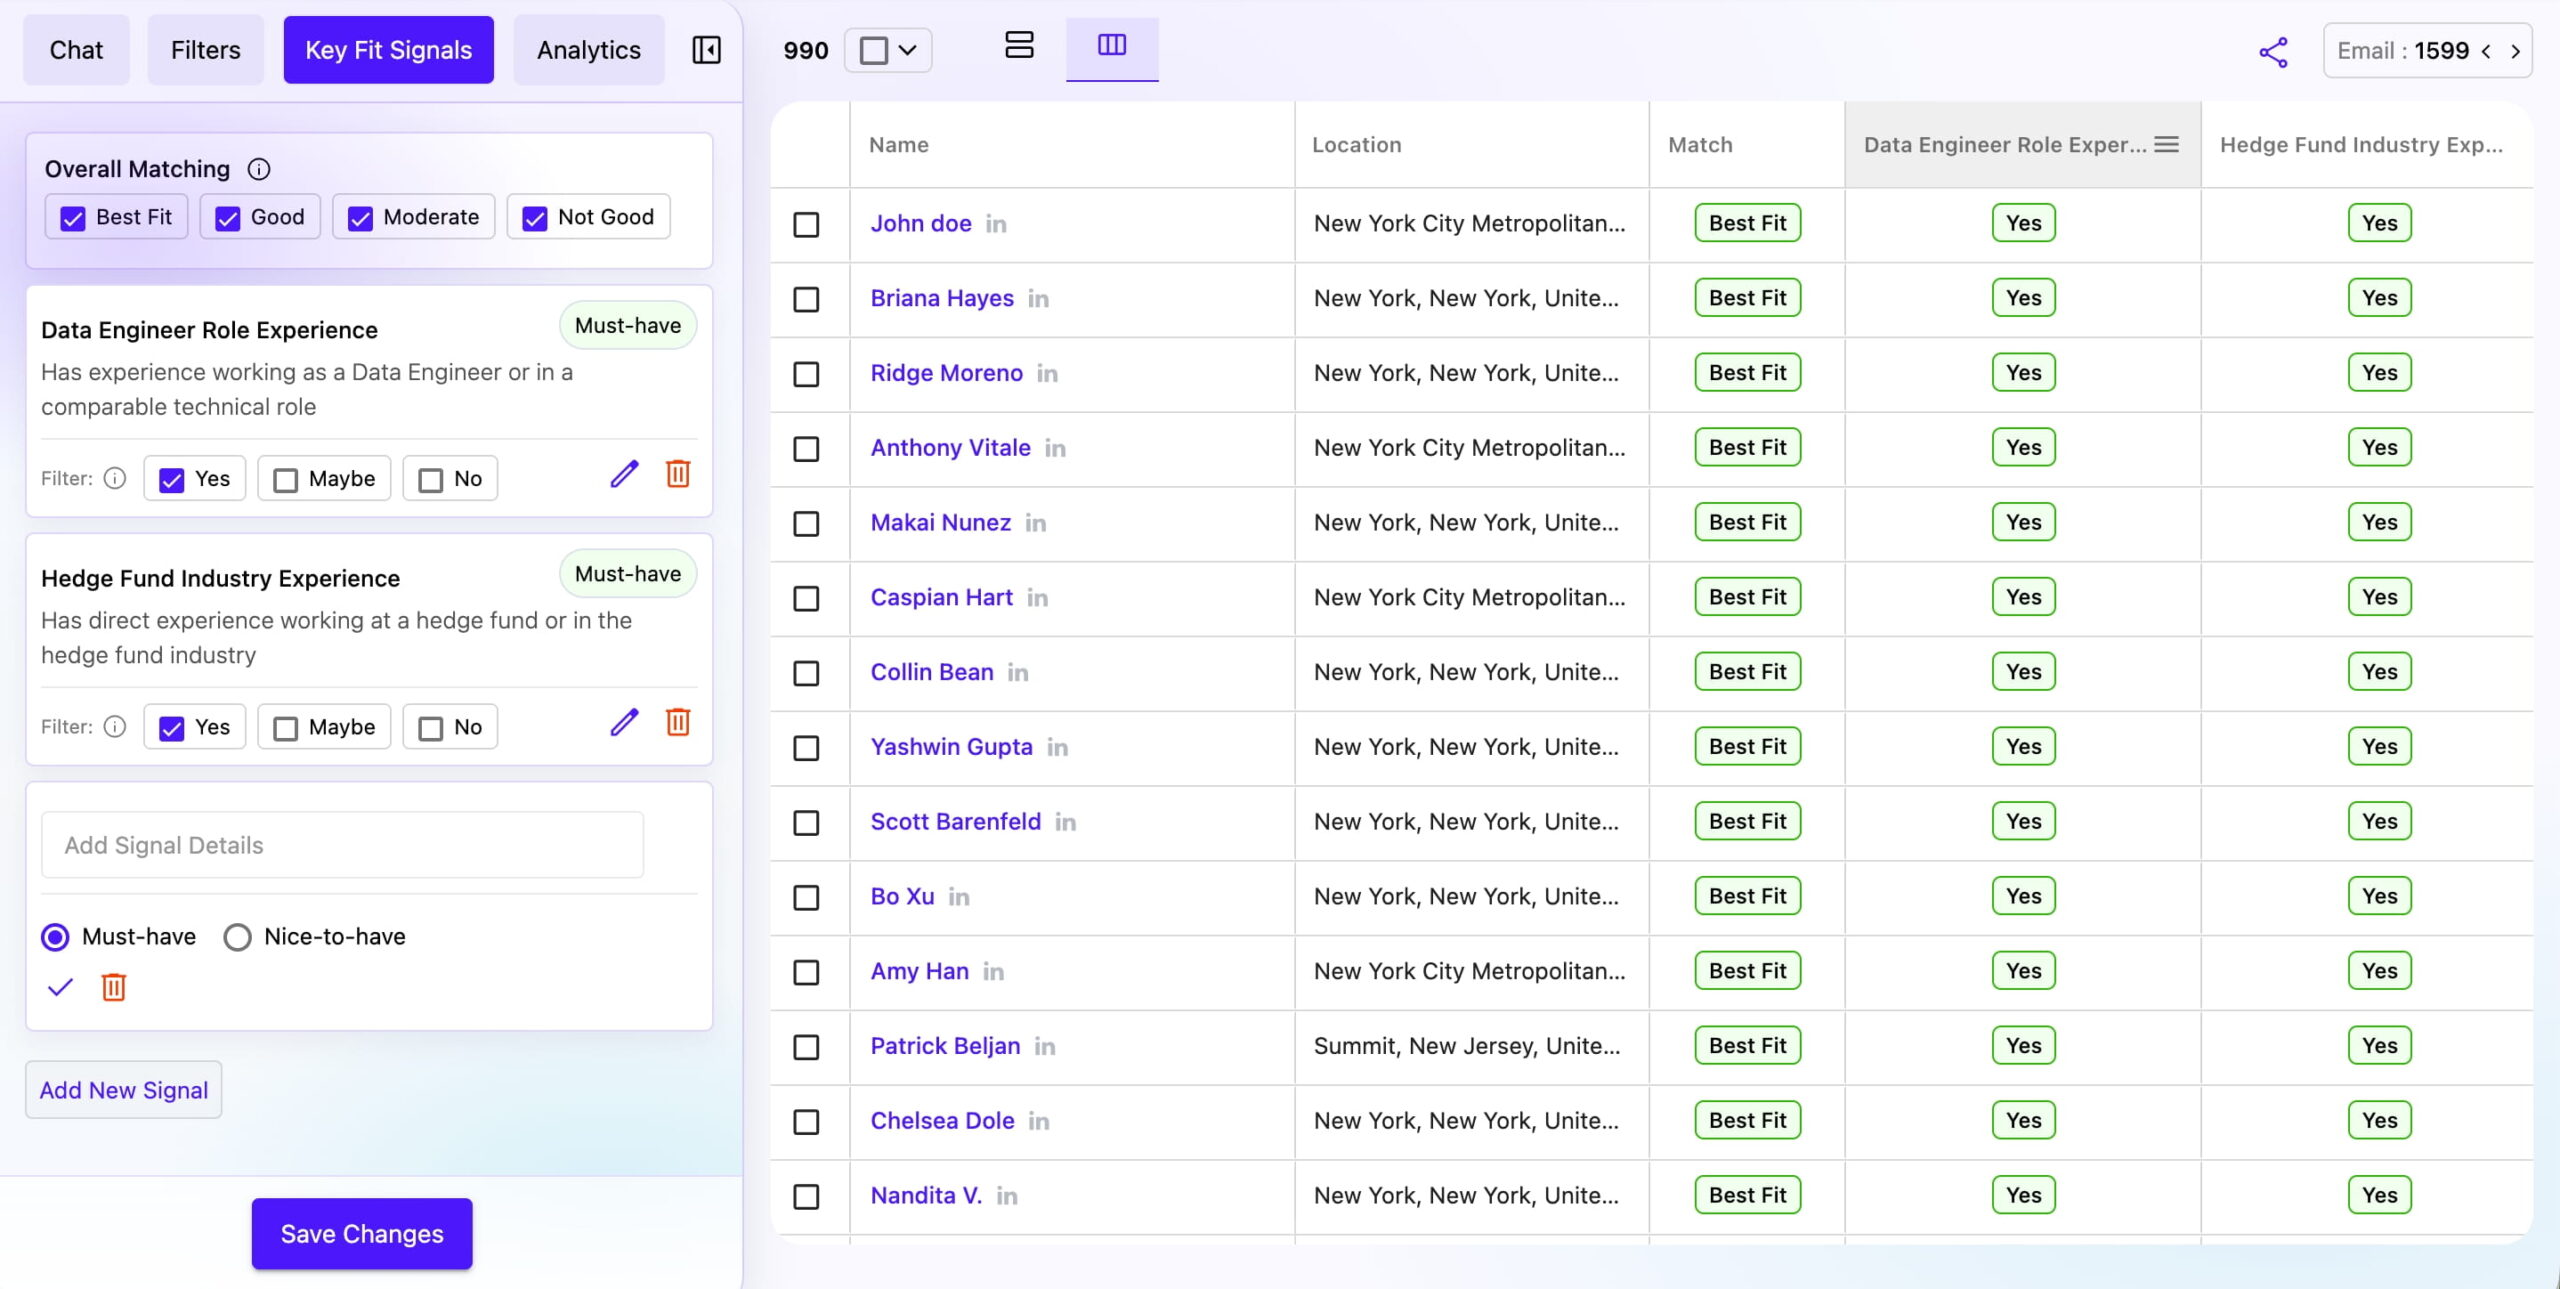
2. Key Fit Signals Result Screen
Once screening completes, the results appear in a structured, decision-ready format.
| Section | Description | Action |
|---|---|---|
| Left Panel (Signal Controls) | Shows your signal configuration with Overall Matching filter and individual signal cards with Yes/Maybe/No filters. | Adjust filters to dynamically update the candidate list in real-time. |
| Right Panel (Candidate List) | Displays candidates with columns for Name, Location, Match score, and individual signal results (Yes/No for each signal). | Quickly understand why a candidate passed or failed each criterion. |
| Match Column | Shows the overall match score for each candidate (Best Fit, Good, Moderate, Not Good). | Sort or filter by match score to focus on top candidates. |
| Signal Columns | Each signal has its own column showing Yes or No for each candidate. | See at a glance which candidates meet specific criteria. |
| Candidate Count | Shows total candidates matching current filters (e.g., 990 candidates). | Monitor how filter changes affect your pool size. |
| Shortlist and Action | Select candidates to shortlist or add to My List. | Streamline your focus to only the strongest matches. |
Best Practices
- Start with essential signals – Begin with 2-3 Must-have signals for core requirements
- Use Yes filter for Must-haves – Only check “Yes” for essential qualifications to ensure quality
- Include Maybe for Nice-to-haves – Check both Yes and Maybe for preferred qualifications
- Review signal columns – Use the detailed signal columns to understand each candidate’s strengths
- Iterate and refine – Add or adjust signals based on initial results to improve matching
Tip: Click “Save Changes” after modifying your signals to update the screening results.